Over a hundred years ago, Maria Montessori founded a method where play, curiosity, and exploration are the primary methods in which the student learns, known as the Montessori Method of Education. Sounds perfect for music, no?
It felt natural to me to be in an environment where the kids are learning by manipulating objects, rather than receiving instruction solely through verbal and visual means. A kinesthetic, object-centered approach makes it easy to truly understand concepts that are difficult as abstract ideas, but when illustrated as tangible elements, suddenly become self-evident.
It occurred to me that rhythm and meter were similar to other classroom subjects that could be illustrated with “manipulatives” – items that look like toys but illustrate in a manner that all students understand, regardless of their learning style. The beauty of using manipulatives is that it naturally uses multiple parts of the brain, and appeals to visual, tactile, and aural learners. When the teacher is able to appeal to the individual student’s strengths, successful learning is almost guaranteed.
The Mystifying Nature of Meter and Note Values
There are a lot of challenges with teaching note values and meter. Firstly, most young students have not studied fractions yet, but our entire music note values are based on the idea of “whole” divides into two “halves” which then gets divided into four “quarters,” and so on. So we seemingly randomly assign names to types of notes, and the student has no knowledge of the underlying concepts.

To make things worse, the names we have given the notes do not correspond to the number of beats they get. Half notes do not get half a beat. And depending on the time signature, half notes might get two beats, or one beat, or even four counts.
The problems continue: the dot that creates the dotted note value is not a consistent value – it is a concept regarding percentages. Time signatures look like fractions, so by the time the student actually starts studying fractions, the item that actually looks like a fraction is not a fraction, but the dots on the page which do not remotely resemble fractions are actually based on fractions. Horizontal lines that denote measures resemble symbols to pause or stop… just think how the international symbol to stop is a hand raised horizontally. But of course, we musicians just plow through those measures without stopping.
The Rhythm Roadblock
All this creates a problem. I see students who can just play the note pitches with no regard to the timing at all. They cannot figure out the rhythm on their own, so any practice at home is usually with an inaccurate rhythm. They need to have the teacher demonstrate the rhythm, and usually just memorize the tune and play to what they’ve learned by ear (which is a valuable skill, as well, but our goal is to help the student be able to play accurately independent from the teacher). And then we introduce the metronome, and usually the student just plays the rhythm they want to play, oblivious to the ticking of the metronome.
What I used to do is draw a pie, with four fruits of the student’s choice. The whole pie had four blueberries, and when you cut the pie in half, you get two blueberries in each half. Then cut the half pie in half again, you get a quarter pie, with only one blueberry in it. A tasty idea, and every one of my kids liked pie and enjoyed the illustration, but not one came away with a good concept of note values. I needed something better.
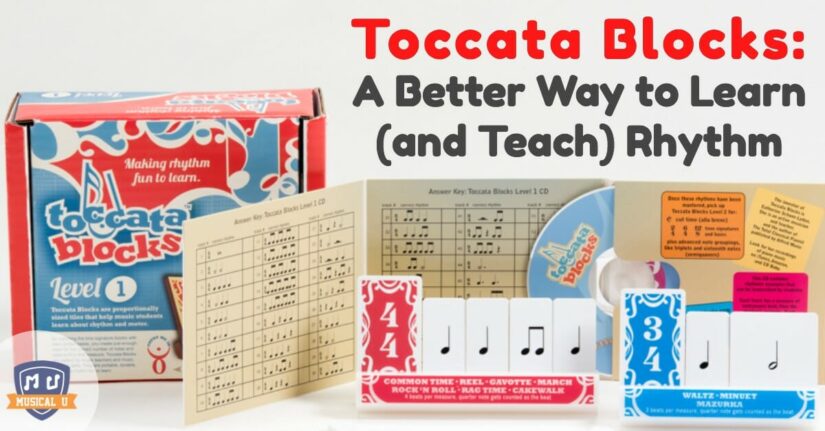
The Toccata Solution
 And so, I created what was to become the prototype for Toccata Blocks.
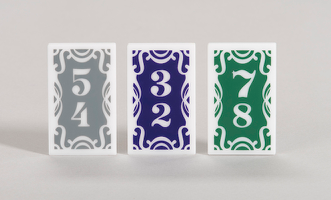
I used flat planks of wood purchased from Home Depot, and cut proportionally shaped pieces of wood and stuck vinyl sticks of the notes onto them.
I sanded the pieces of wood so they wouldn’t give the kids splinters, and they looked like a modified-version of those maple building blocks that very small kids play with. These were great in my little studio. My young students loved getting the blocks out, playing with them, and they quickly learned about rhythm.
From Notes to Meter
It was around this time that I started only counting note values, regardless of the note’s placement in the measure. That was in answer to one child who, looking at a series of four quarter notes, said, “Why does that note get “one” and that note get “four”?”
In a moment, I realized that we often mix apples and oranges, teaching kids that those four quarter notes get counted one-two-three-four. The reality is that the placement of the note within the measure has no connection to the note value, so to teach note values, we should just count note values: “one-one-one-one”. Once my students have a solid knowledge of note values and what each note means, I expand to teaching the bigger picture of meter – and only then do I start counting “one-two-three-four”.
Toccata in Every Classroom
And then Ari came into my life. Ari was about 5, and had a mild learning disability. He did not like school. Nothing came easily to him, and school was just one miserable challenge after another.
”My young students loved getting the blocks out, playing with them, and they quickly learned about rhythm.”
But he took private piano lessons from me, and he loved these blocks. He was really good with them, and strung long sequences of them along the music shelf of the piano, correctly demonstrating each one. After his lesson, he ran joyfully back to his classroom. Finally, his teacher came to me and asked what I was doing with him. She wasn’t able to reach him, and was curious why the happiest part of his week was coming to his piano lesson. She took one look at my blocks, and exclaimed, “This is brilliant! Every classroom should have these!”
The journey from those simple oak blocks to what turned into Toccata Blocks is a long, complicated story. It was a simple country piano teacher turned entrepreneur, with designers, attorneys, manufacturers, safety testing, trademarks, and lots of product testing and tweaking. But the final product shows the effort. I use Toccata Blocks every day that I teach, with both younger and older students.
The Toccata Advantage
Besides appealing to tactile, visual, and aural learners alike, the blocks have a lot to offer students in terms of ease of use, versatility, and practicality. Some advantages to using the Toccata Blocks are:
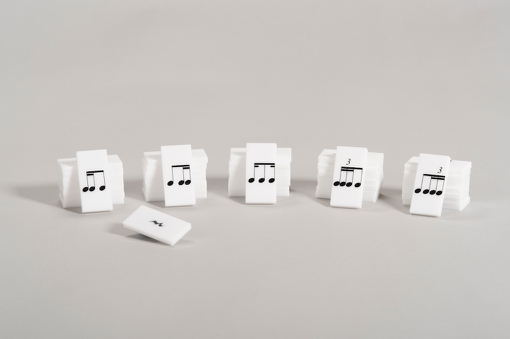
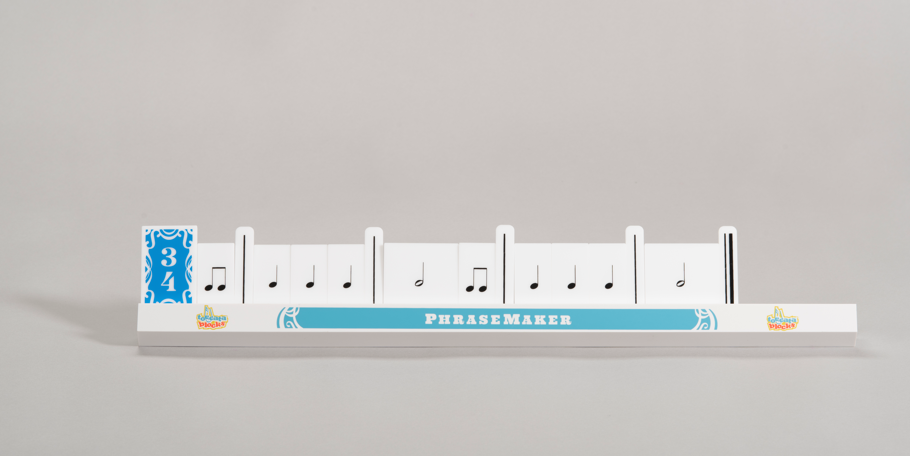
- Use of proportions in the note tiles make concepts much easier to learn
- Tiles have notes on one side and rests on the other, for easy transition between the two
 Eighth notes are paired, so students cannot inadvertently create a crazy syncopated rhythm
- Tiles are washable, durable, and attractive to both younger and older students
- Color-coded time signatures and bases make teaching time signatures much easier, and they are self-correcting for independent use
- Makes teaching how to use the metronome easier (in fact, using the metronome with the Toccata Blocks is fun! Kids love it!)
- Helps the student independently decipher rhythms in music
- Blocks grow in complexity to continuously challenge the student as they advance
- Appeals to different learning styles: tactile, visual, and aural learners
The Many Ways of Using Toccata
A typical way I might use Toccata Blocks might be in a one-on-one lesson, just to end the lesson with something fun. I’ll put out the tiles that the student is capable of using, and then challenge them to put together a rhythm. I slowly introduce new concepts, and pretty soon the beginner student is counting through paired eighth notes.
In classroom settings, I use one set per two or three students. They can try challenging each other, and learning through demonstrating rhythms to their peers. Also, they work great in “stations” where students can do independent work. Level 1 comes with a rhythm challenge CD, where the students can use Toccata Blocks to illustrate the rhythm performed on the CD (and there is an answer key on the CD cover). Often, I’ll put up a phrase, just to see if the students can guess the tune just from its rhythm.
What’s great is that the blocks can help students of all ages. I’ve had parents visit, and comment that they never understood note values until they saw Toccata Blocks. “Where was this when I was learning music?” they lament.
I find that using Toccata Blocks makes teaching the challenging concepts of note values, rhythm, and meter much easier and more pleasurable for everyone involved. It taps into a logical and intuitive realm of thinking, making intangible ideas recognizable and easily understandable. I’ll never go back to fruit-pie-drawings again!
Intrigued by Toccata Blocks? Visual and kinesthetic tools for learning rhythm are far from being “for kids only” – musicians of any age and level can benefit greatly from having an object-centered tool to help them make sense of complex time signatures, rhythms, and all those pesky dotted notes.