A lot of discussion can be had over whether the guitar should be tuned by ear or with the help of an electronic device. As we’re about to see, tuning by ear has multiple benefits over the “easier” path of using a tuner.
Guitars go out of tune for all sorts of different reasons, and you won’t always have an electronic tuner around to help you out. For quick, on-the-fly tuning, tuning by ear reigns supreme.
By the end of this guide on how to tune a guitar for beginners, you’ll know how to tune your guitar with just your hands and ears, popular alternate tunings, and how to check that you’ve tuned correctly by using a piano.
Why You Should Tune Your Guitar By Ear (Instead of Relying on an Electronic Tuner)
So why am I encouraging you to practice tuning by ear?
It’s because it lays the foundation of pitch ear training. If you can understand the pitch relationships between notes and become sensitive to details of tuning just by consistently tuning your guitar every day, you’ll have built a solid foundation of pitch skills.
After a month’s practice, you’ll be able to strum once and instantly tell whether the guitar is in tune or not, and a little after that you will even be able to tell straight-off which string sounds different than it should. So tuning by ear lays the basic foundation for understanding notes just by listening. Some guitarists even use it as the basis for developing perfect pitch.
Step By Step Instructions For Tuning A Guitar By Ear
Here is our guide to how to standard tune your guitar by ear. But before we dive into the nitty-gritty of tuning, it’s important to understand the basics of your guitar.
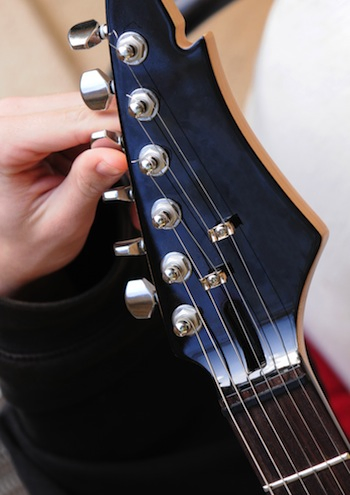
Prepare: Check Your Pegs
If you haven’t tuned your guitar before, take a moment to familiarise yourself with your tuning pegs. Depending on whether your pegs are all on one side (electric style) or three on each side (acoustic style) and whether the guitar has been strung in the normal way, the directionality of each peg might vary.
You want to find out: does turning the peg clockwise make the string tighter (and its pitch higher) or looser (and its pitch lower)?
Once you get familiar with this setup on your guitar it will become instinctive and you won’t need to think about it again.
Prepare: Understand How Guitar Strings Work
 When you’re looking down at the six strings of your guitar, you’ll notice that the strings go from thickest to thinnest. The topmost thickest one is your low E string, also called the sixth string. Following that, the next thickest is A, or the fifth string, and so on, all the way to your first string (the high E). The pitch order of strings in standard tuning, from sixth string to first string, and therefore from lowest to highest, is EADGBE. We always tune in “reverse” order, starting with the sixth string, or low E, and continuing in order all the way to the first string, or high E.
You can help yourself remember this pitch sequence with a mnemonic, such as “Every Apple Does Go Bad Eventually”. For for something more ominous, you can use “Eddie Ate Dynamite Good Bye Eddie”.
Now that you know how pegs and strings work, you are ready to begin. Lowest string first…
Sixth String: Low E
Listen to any example of a “correct” E note as your reference pitch. For example you can use a recording of a standard E note like the one below and play it in your speakers, or use a pitch pipe. Listen, and play the E string of your guitar.
If you use a guitar sound, pitch pipe or other simple “tone” it is comparatively easy to tune by ear. If you have to use another instrument such as a nearby piano, you might find the difference in timbre makes it harder to compare the notes’ pitches.
Now, after playing the reference E note, let the sixth string of your guitar ring, and if you find the two sound perfectly the same, then your sixth string is in tune. More likely you will hear a slight clash (discord) which means your guitar string is slightly out of tune.
As you practice tuning and do pitch ear training you’ll find you can directly hear whether your guitar string is too high or too low. At first it might take a bit of experimentation.
Slowly rotate the tuning peg of your sixth string, gradually adjusting in one direction to see if the two notes come into agreement. If they don’t, and you hear that the pitches are becoming further apart, simply reverse your direction and adjust pitch until the two notes match.
Note: The tension of the string shouldn’t become too high (i.e. tight) or too low (i.e. loose). This means you are trying to tune the string into either a higher octave, where the note would match but the string would become so tight it might snap, or a lower octave, where the string would become unplayably loose.
Fifth string: A
Once the E string is in tune, you can put your reference note aside – from here you can tune the other strings based on your (now nicely-tuned) sixth string.
On the E string, playing the 5th fret should produce the same note as the open A string. So, place your finger on the 5th fret and play both the E string and the A string one by one. If the A string sounds higher, rotate its tuning peg to lower its pitch. If it sounds lower, rotate it the other way. Until and unless you feel that the notes sound exactly the same when played in unison, you should adjust the tuning peg accordingly.
Fourth string: D
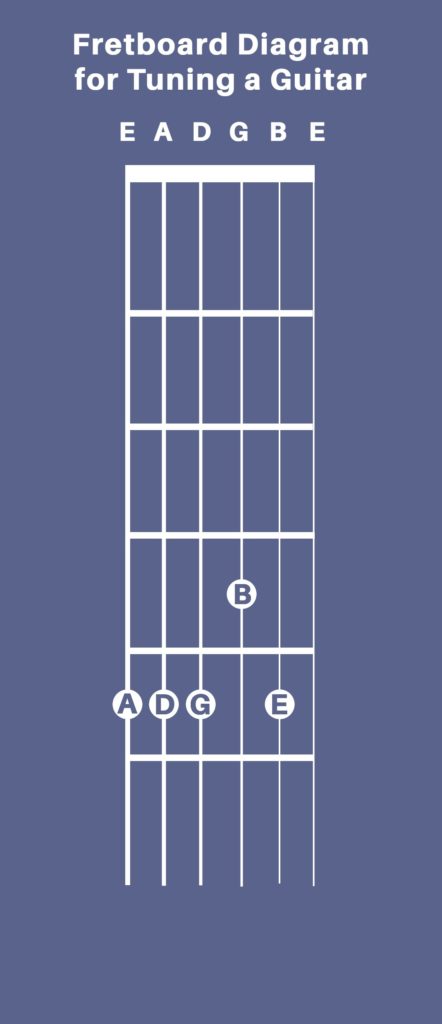 The note on the 5th fret of the A string you just tuned will be same as the open note of the D string you’ll tune next. Play the two strings in unison, by placing your finger of 5th fret of the fifth string and ringing the open note of the fourth string. Listen for whether the two notes are the same, in close discord, or have a noticeable gap in pitch. Adjust your tuning peg until you hear they are perfectly tuned.
Third string: G
Timbre problems may arise when you try to tune your third string (which represents the G note) to the fourth string. This is because on both acoustic and electric guitars there is typically a change in string type: either from nylon to steel or from single strings to wound strings. This affects the timbre of the note and can make it harder to directly compare pitches. Don’t worry, you’ll get the hang of this soon enough!
Now you should be getting the hang of the process as you tune your third string, which should be a G note. On the 5th fret of your fourth string is a G, so you can use this to tune your third string’s open note. Once again, listen to it and check if they sound similar. If not, turn the tuning peg for higher or lower pitch until they match.
Second string: B
Nearly finished!
Place your finger on the 4th fret of the third string, which will produce a B, the same as the open note of your second string. Or at least, it will be once you tune up that second string! Adjust your B string, until the two notes sound alike.
Pro Tip: It’s the 4th fret we use this time, not the 5th!
First string: High E
Finally the last one, your high E string. You can tune this in two ways:
- Since your low E string is already tuned, you can tune your high E by referring to this one. However, note that they are actually two octaves apart, so you may find this gap makes it difficult to compare the two pitches.
- If you are new to tuning you might want to avoid that, and instead continue with the method we have been using: place your finger on the 5th fret of the second (B) string, and you will play an E which exactly matches your open first string. Again, rotate counter-clockwise for higher pitch and clockwise for lower pitch.
You’re Done!
Finish up the tuning process by checking each of those note pairs in turn, from your low E and A string on up. Check the low E against your source note again. If any don’t sound quite correct, adjust the peg to make them match, but make sure you follow the low-to-high sequence again. This means that if the pair of notes don’t match, adjust the tuning of the higher string to match the lower one. This way your tuning is always rooted on your low E string. If you have access to a reference note for the high E string you can also check that one directly.
Finally, strum a few chords and play a riff or two. Does anything sound strange or wrong with the tuning? If so, listen carefully and try to identify which string is to blame. Then return to your note pair comparisons to make the required fix.
Pro Tip: The above method also works for the 12-string guitar, with some tweaks. Also, because its four strings follow the same tuning as the lowest four strings of the guitar (EADG), this method can be used to tune the bass.
How Do I Know If I’ve Tuned Correctly?
When you’re just starting to tune your guitar by ear, you’ll want to check that you’ve done it right. This can be achieved in several ways. You’ll feel tempted to simply tune with these methods to begin with, but we encourage you to resist the temptation! Use these methods to double-check that your tuning by ear was done correctly.
Check with a Tuner
Broadly speaking, there are three types of tuners out there that you can use, with each suited to different scenarios.
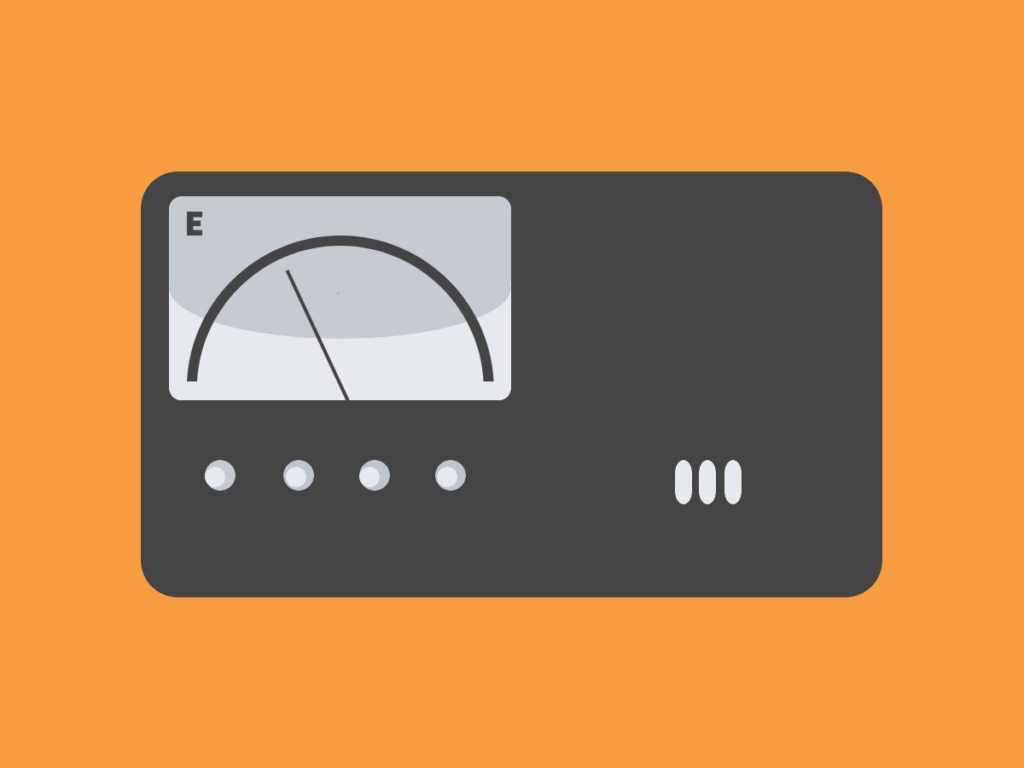 A standard tuner is a rectangular, “box-shape” tuner that tells you if and by how much your note is off-pitch from standard tuning. It can be used with both electric and acoustic guitars; the built-in microphone picks up on the pitch you are playing, or you can use the tuner’s input jack for a more precise reading for electric or electroacoustic guitars.
A pedal tuner is simply a guitar pedal that simply checks the pitch of your strings instead of laying fuzz or distortion over your sound. They are incredibly precise, but unfortunately only work with electric or electroacoustic guitars.
A headstock tuner will clip onto your guitar, sensing the pitch of a string through the vibrations created when you pluck a string, and telling you whether your note is flattened, sharpened, or just right. If you’re wondering how to most accurately tune a classical guitar, this is it.
Also, if you were wondering whether you can tune a ukulele with a guitar tuner, the answer is absolutely yes: many headstock tuners have a “ukulele” setting.
Pick one that works with your guitar, and see how accurate your tuning by ear is!
Check with a Piano
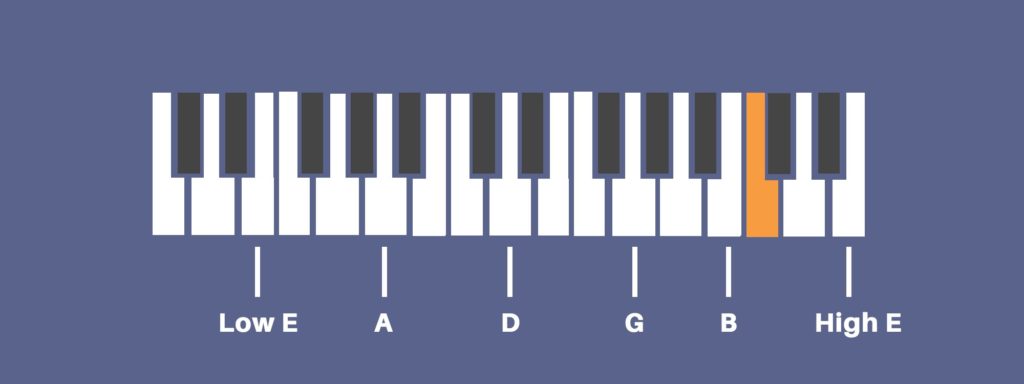
As well as being an easy and reliable way to check your tuning, this is a good ear training exercise for recognizing the same pitch on two different instruments. Simply compare the pitch of each string to the pitch of the corresponding key on the piano.
The best part is, you don’t even have to worry about an octave difference. Here’s a cheat sheet for which keys correspond to each pitch for guitar standard tuning; the numbers designate the note’s position from the left on a standard piano keyboard. For example, D3 is the third-lowest D key on the piano. Middle C is shown in orange:
Alternative Methods
The tuning method we’ve presented above is the most common method used by guitarists for many years. However, there are other ways.
Our friend Gerald Klickstein, classical guitarists and author of The Musician’s Way, has gone quite deep on the subject and even written a whole book on guitar tuning – Tuning the Guitar by Ear. Yet even with his erudition, his goal has been to make tuning more simple, fast, and effective. Read a wonderful summary of his method of Pain-Free Tuning.
Alternate Tunings
The tuning EADGBE is known as standard tuning, and is the most popular.
However, it is far from being your only option. You can alter the tuning of a string or two to open up a whole new way of playing, with chords that would be impossible in standard tuning! The best part: you can do this with just your hands and ears, no tuner necessary. Electronic tuners often don’t have settings for these alternate tunings, so it’s incredibly useful to be able to do this by ear!
If you want to push limits of your guitar playing and songwriting, try one of the following alternate tunings. With each one, you’ll want to start in standard EADGBE tuning, and tweak accordingly.
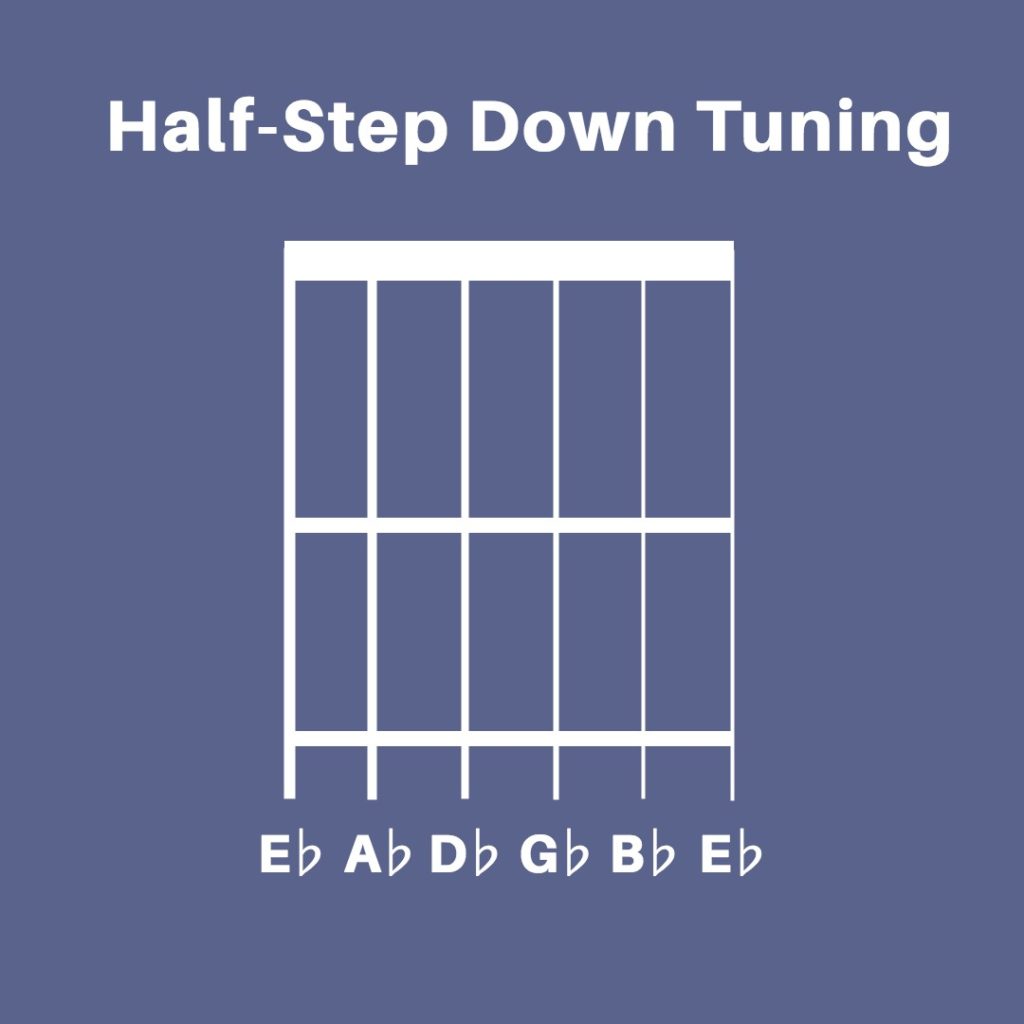
How to Tune a Guitar a Half-Step Down
You may see some guitar tabs asking that you tune each string a half-step down. Fear not – this isn’t nearly as much of a pain as you may think.
- Fret the fifth (A) string at the sixth fret. This will produce an Eb, which you will use as a reference note to tune your sixth string.
- Fret the newly Eb-tuned sixth string at the fifth fret. This will produce an Ab, which you will use as a reference note to tune your fifth string.
- Fret the newly Ab-tuned fifth string at the fifth fret. This will produce a Db, which you will use as a reference note to tune your fourth string.
- Fret the newly Db-tuned fourth string at the fifth fret. This will produce a Gb, which you will use as a reference note to tune your third string.
- Fret the newly Gb-tuned third string at the fourth fret. This will produce a Bb, which you will use as a reference note to tune your second string.
- Fret the newly Bb-tuned second string at the fifth fret. This will produce an Eb, which you will use as a reference note to tune your first (top) string.
How to Tune a Guitar to Drop D
Drop D tuning differs from standard tuning in only one way: the sixth string is tuned down one tone, from E to D, resulting in DADGBE tuning.
To drop D tune a guitar, simply lower your sixth string by a whole tone by comparing it to the open fourth D string:
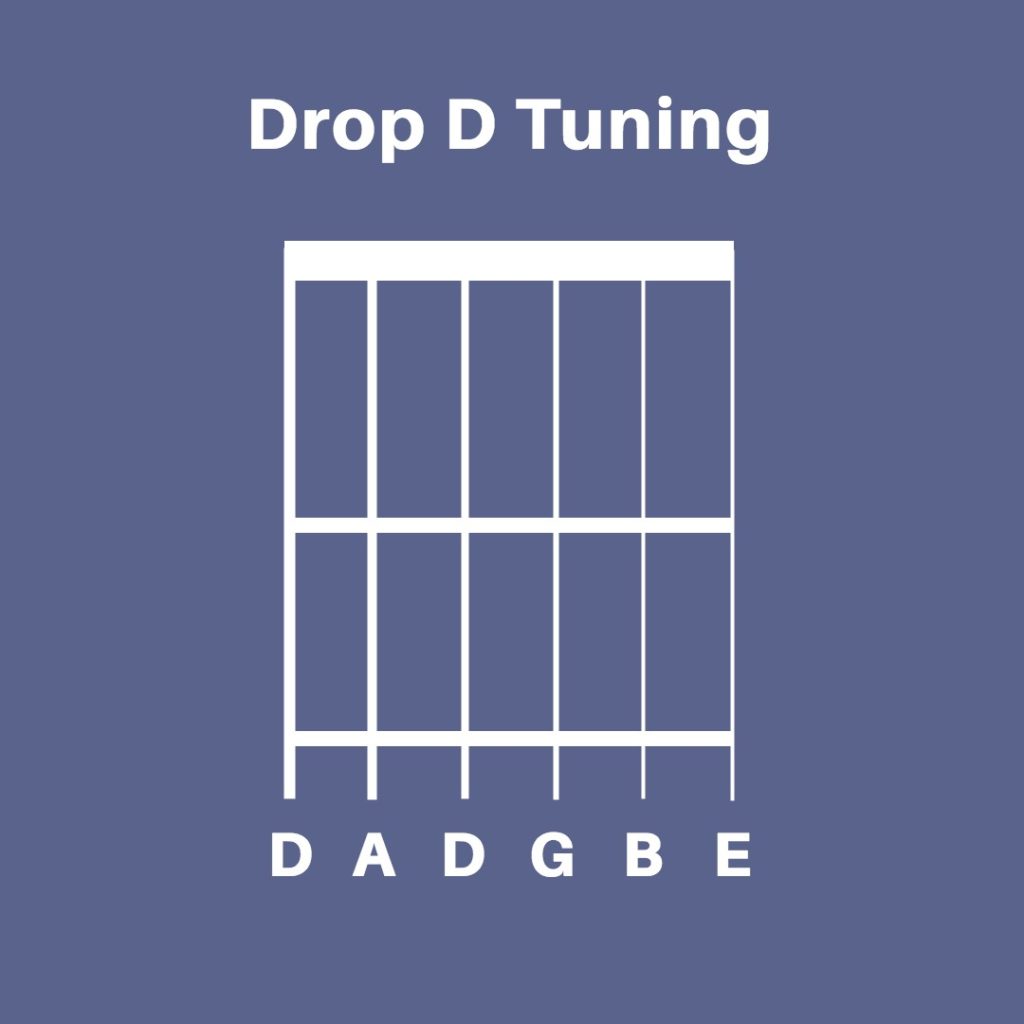
This is one of the simplest tunings, and is popular in blues, country, and folk.
How to Tune a Guitar to Open G
In this tuning, strumming your guitar without putting any fingers on the fretboard will result in a G chord. The pitch pattern will be DGDGBD.
Start by lowering your sixth and first strings from E to D by comparing them to the open fourth string. Then, lower your fifth string by a whole tone by comparing it to the third string. This may take a bit of practice because of the octave difference, but will soon become second nature!

In this tuning, you can play any major chord simply by barring your finger across different frets – no need for complicated chord shapes!
Open G tuning is popular in blues and rock, most notably because of Keith Richards, who wrote the riffs for many of the Rolling Stones’ most popular songs with this tuning. If you want to cover “Brown Sugar” or “Gimme Shelter”, do it in open G!
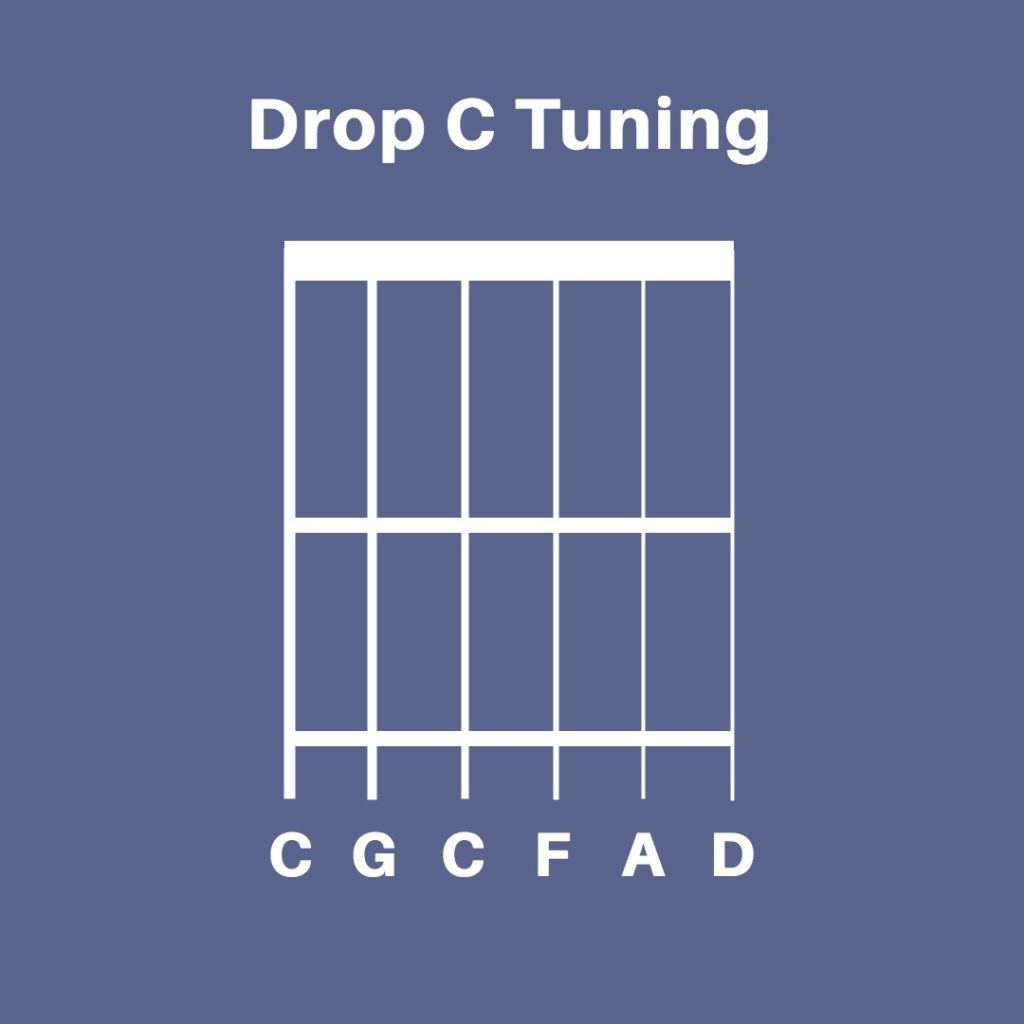
How to Tune a Guitar to Drop C
Drop C tuning, or CGCFAD, creates a heavier, lower sound on your guitar. This tuning is more advanced than the previous ones, as it requires you to change the pitch of every string. As always, start in standard tuning. Then:
- Fret the fifth (A) string at the third fret. This is your reference for what the sixth string should sound like, although the sixth string should be one octave lower.
- Fret the newly C-tuned sixth string at the seventh fret. This will produce a G, which you will use as a reference note to tune your fifth string.
- Fret the newly G-tuned fifth string at the fifth fret. This will produce a C, which you will use as a reference note to tune your fourth string.
- Fret the newly C-tuned fourth string at the fifth fret. This will produce an F, which you will use as a reference note to tune your third string.
- Fret the newly F-tuned third string at the fourth fret. This will produce an A, which you will use as a reference note to tune your second string.
- Fret the newly A-tuned second string at the fifth fret. This will produce a D, which you will use as a reference note to tune your second string.
Tuning By Ear While Training Your Ear
The first few times you tune a guitar by ear, it can be frustrating – sometimes you just can’t track down that strange-sounding string. It may be tempting to reach for that electronic tuner, but don’t give up! Your ear will steadily get better and better at recognizing those “off” notes, and tweaking them to the right pitch.
Best of all, your sensitivity to pitch will improve considerably, making you a better musician all-round, and helping you with your improvisation, singing, songwriting, and more.